No-Knead Gluten-Free Bread
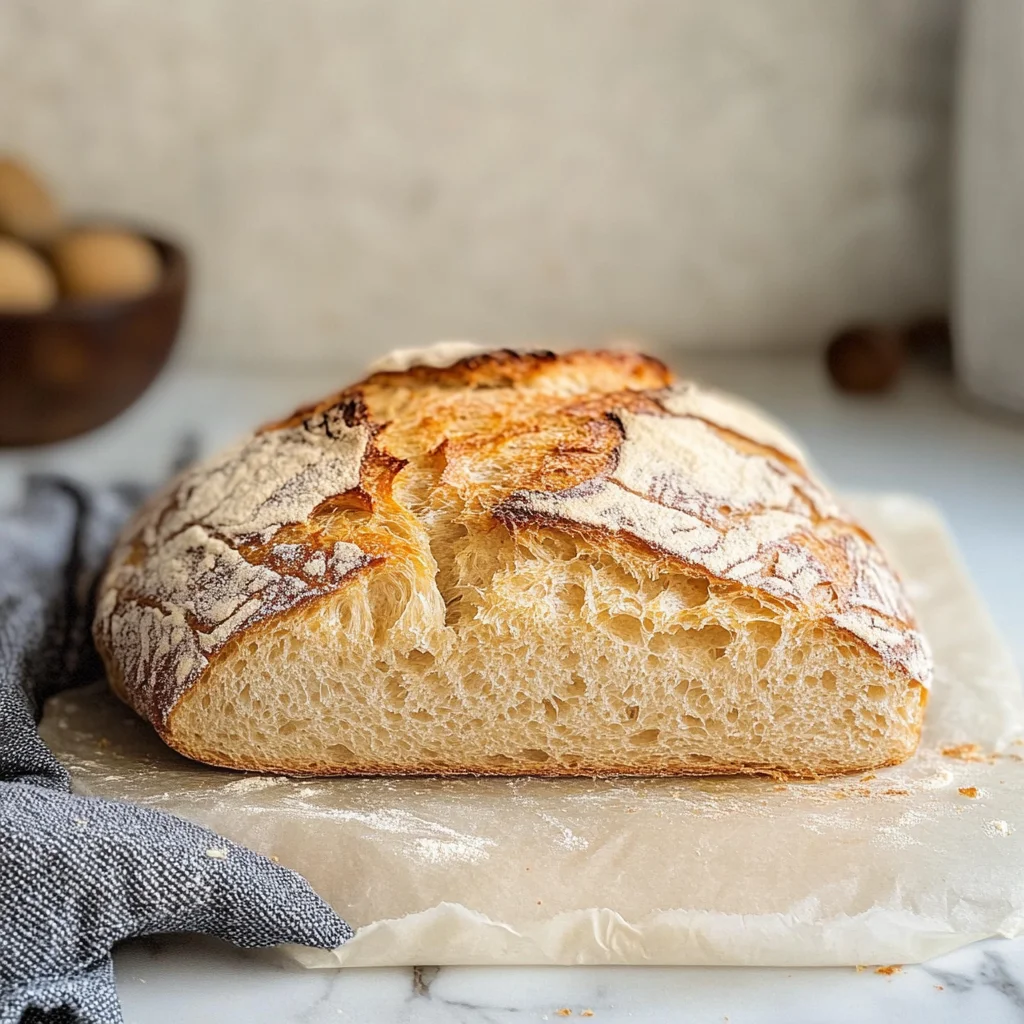
If you’re looking for a simple and delicious bread option that caters to dietary restrictions, my No-Knead Gluten-Free Bread is perfect. This recipe is not only easy to follow but also yields a loaf that’s fluffy on the inside and crispy on the outside. It’s ideal for various occasions, whether you’re hosting a gathering or simply want fresh bread at home. Even those who aren’t gluten-free will fall in love with its incredible flavor and texture!
Why You’ll Love This Recipe
- Effortless Preparation: This no-knead method saves time and effort, making it accessible for everyone.
- Fluffy Texture: Enjoy a light and airy bread that rivals traditional loaves.
- Versatile Use: Perfect as an appetizer, side dish, or even for sandwiches.
- Customizable: Feel free to add herbs or spices to make it your own.
- Dairy-Free Delight: A great option for those avoiding dairy without sacrificing taste.
Tools and Preparation
To make your No-Knead Gluten-Free Bread, you’ll need a few essential tools. Having the right equipment ensures a smooth baking process.
Essential Tools and Equipment
- Mixing bowls
- Baking dish with lid or aluminum foil
- Measuring cups and spoons
- Parchment paper
Importance of Each Tool
- Mixing bowls: Necessary for combining ingredients easily without spilling.
- Baking dish with lid: Helps create steam while baking, resulting in a crusty exterior.
- Measuring cups and spoons: Ensures precise ingredient measurements for consistent results.
Ingredients
If you can’t have dairy or gluten, I have you covered with my easy No-Knead Gluten-Free Bread. This bread is fluffy on the inside and crispy on the outside. This is what all gluten-free bread dreams are made of. Even if you are not gluten-free.
Ingredients:
– 1.5 cups warm water (370 ml)
– 1 teaspoon sugar (4 grams)
– 1/2 teaspoon active dry yeast (2 grams)
– 3 cups gluten-free flour (420 grams; I used Caputo)
– 1 teaspoon salt (5 grams)
How to Make No-Knead Gluten-Free Bread
Step 1: Activate the Yeast
Start by adding the first three ingredients to a bowl and stir well. Wait five minutes to see if the yeast activates; if it doesn’t, repeat this step. Ensure that the water is lukewarm—not too hot or cold—to help activate the yeast effectively.
Step 2: Prepare the Dough
In a separate large bowl, combine the flour and salt. Slowly add in the activated yeast mixture while stirring until you achieve a thick, sticky dough. It should not be too wet or too dry.
Step 3: Let It Rise
Cover the dough and let it rest at room temperature for 5 hours in an area free from drafts. Once risen, lightly flour your counter and pour out the dough.
Step 4: Shape the Dough
Flour the top of your dough and gently shape it into an oval ball without kneading.
Step 5: Prepare for Baking
Transfer your shaped dough into any baking dish lined with parchment paper. Cover it with a lid; if you don’t have one, use double layers of foil instead.
Step 6: Bake in Cold Oven
Place the bread into a cold oven. Set your oven temperature to 450°F (232°C) and bake for 40 minutes without pre-heating.
Step 7: Final Baking Touches
After 40 minutes, uncover your bread and bake it for an additional 30 minutes or until it’s golden brown all over.
Step 8: Cool Down
Allow your bread to cool for about 5 to 10 minutes before slicing into it. Enjoy this delicious No-Knead Gluten-Free Bread!
How to Serve No-Knead Gluten-Free Bread
No-Knead Gluten-Free Bread is versatile and can be served in many delightful ways. Whether you enjoy it on its own or paired with other dishes, this bread adds a unique touch to any meal.
Toast it Up
- Toasted slices make a great breakfast option. Add butter or your favorite jam for a sweet start to the day.
Serve with Dips
- Pair this bread with hummus, guacamole, or spinach dip for a tasty snack or appetizer at gatherings.
Make Sandwiches
- Use the fluffy slices to create satisfying sandwiches filled with your choice of meats, veggies, and spreads.
Enjoy with Soups
- This bread complements soups beautifully. Serve alongside a warm bowl of tomato basil or creamy potato soup for a comforting meal.
Create Bruschetta
- Top toasted slices with diced tomatoes, garlic, and basil for a delicious bruschetta that’s perfect for entertaining.
Accompany Cheese Boards
- Include No-Knead Gluten-Free Bread on your cheese platter. It pairs well with various cheeses and charcuterie.
How to Perfect No-Knead Gluten-Free Bread
Creating the perfect No-Knead Gluten-Free Bread requires attention to detail. Here are some tips to enhance your baking experience:
-
Use Quality Flour: Stick to trusted brands like Caputo’s Gluten-Free Flour for consistent results.
-
Check Yeast Freshness: Ensure your yeast is not expired for better activation and rise in the dough.
-
Monitor Water Temperature: The water should be lukewarm. Too hot or too cold can hinder yeast activation.
-
Allow Proper Rising Time: Let the dough rest covered in a draft-free area for at least 5 hours to achieve optimal fluffiness.
-
Shape Gently: When handling the dough, avoid kneading. Just shape it gently into an oval ball before baking.
-
Bake Without Preheating: Start baking in a cold oven as per the recipe for a crusty exterior and soft interior.
Best Side Dishes for No-Knead Gluten-Free Bread
No-Knead Gluten-Free Bread pairs wonderfully with various side dishes. Here are some excellent options to consider:
-
Mixed Green Salad: A fresh salad with greens, nuts, and vinaigrette adds crunch and flavor alongside the bread.
-
Roasted Vegetables: Seasonal roasted veggies bring out natural sweetness and are an excellent complement to the bread’s texture.
-
Potato Wedges: Crispy potato wedges seasoned with herbs provide a hearty side that balances well with gluten-free bread.
-
Grilled Chicken Skewers: Tender chicken skewers marinated in spices make for a protein-rich pairing that’s easy to prepare.
-
Stuffed Peppers: Bell peppers filled with quinoa or rice create a colorful dish that is both nutritious and satisfying next to the bread.
-
Creamy Tomato Soup: A classic pairing, enjoy your No-Knead Gluten-Free Bread dipped in rich and creamy tomato soup for comfort food bliss.
Common Mistakes to Avoid
Making No-Knead Gluten-Free Bread can be simple, but it’s easy to make mistakes. Here are some common pitfalls to avoid.
- Incorrect yeast activation: If your yeast doesn’t bubble after mixing with water and sugar, it means the yeast is inactive. Ensure your water is lukewarm, not too hot or cold, and try again.
- Using the wrong flour: Not all gluten-free flours work the same. Stick with brands known for good results, like Caputo, for consistent success.
- Neglecting resting time: Rushing the dough’s resting period can lead to dense bread. Allow it to rest covered for the full 5 hours for optimal rise.
- Overbaking or underbaking: It’s crucial to monitor the baking time closely. The bread should be light and golden; adjust your timing based on your oven’s performance.
- Not shaping properly: Simply shaping the dough into an oval without kneading is key. Avoid overworking it as this can affect texture.
- Skipping parchment paper: Always line your baking dish with parchment paper to prevent sticking. This ensures easy removal and keeps your bread intact.
Storage & Reheating Instructions
Refrigerator Storage
- Store in an airtight container for up to 5 days.
- Slice before storing for easier access.
Freezing No-Knead Gluten-Free Bread
- Wrap slices tightly in plastic wrap, then place them in a freezer bag.
- Can be frozen for up to 3 months.
Reheating No-Knead Gluten-Free Bread
- Oven: Preheat to 350°F (175°C) and heat slices for about 10 minutes until warmed through.
- Microwave: Wrap a slice in a damp paper towel and microwave for 15-20 seconds.
- Stovetop: Toast slices in a skillet over medium heat until warm and slightly crispy.
Frequently Asked Questions
Here are some commonly asked questions about making No-Knead Gluten-Free Bread.
What makes No-Knead Gluten-Free Bread different?
No-Knead Gluten-Free Bread uses a simple method that requires no kneading, making it accessible for everyone, especially those avoiding gluten.
Can I use other gluten-free flours?
Yes, but results may vary. Different gluten-free flours absorb moisture differently, so adjustments might be needed if not using Caputo.
How do I know if my bread is fully baked?
The bread should be golden brown on top and sound hollow when tapped on the bottom. If it’s too soft or wet looking, bake longer.
Can I add ingredients like herbs or cheese?
Absolutely! Customize your No-Knead Gluten-Free Bread by adding spices or herbs before mixing in the liquids for added flavor.
How long does it take to make No-Knead Gluten-Free Bread?
From start to finish, including rising time, expect about 6-7 hours. Most of this time is passive waiting while the dough rises.
Final Thoughts
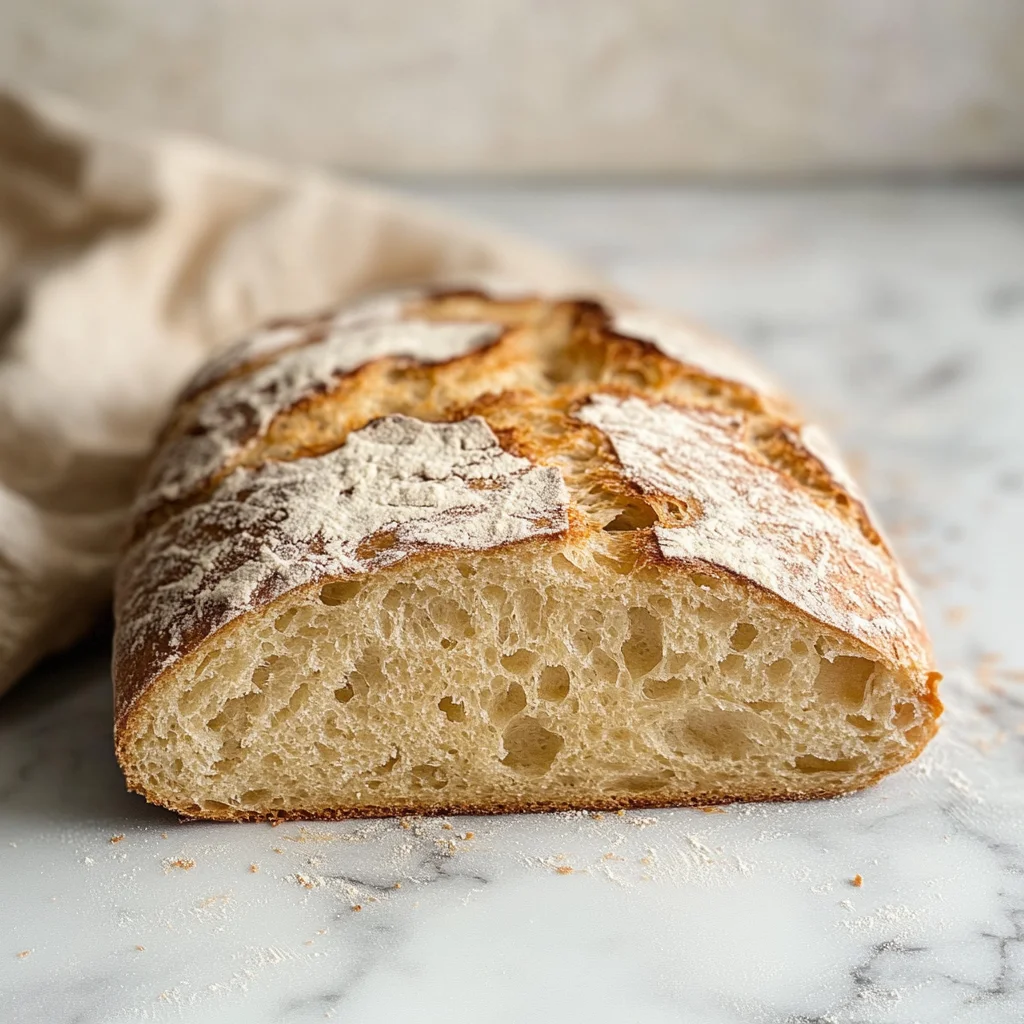
No-Knead Gluten-Free Bread is a delightful alternative that everyone can enjoy. Its fluffy interior and crispy crust make it perfect for sandwiches or as a side dish. Feel free to experiment with different flavors or toppings to make it uniquely yours!
No-Knead Gluten-Free Bread
No-Knead Gluten-Free Bread is the ultimate solution for those seeking a simple yet delicious bread option that suits dietary restrictions. This effortless recipe results in a loaf that boasts a fluffy interior and a crispy crust, making it perfect for any occasion—from cozy family dinners to festive gatherings. Not only is it gluten-free, but its incredible flavor will win over even those who don’t follow a gluten-free diet. With minimal prep time and no kneading required, you can easily create a delightful homemade bread that enriches your meals and snacks.
- Prep Time: 15 minutes
- Cook Time: 70 minutes
- Total Time: 1 hour 25 minutes
- Yield: Approximately 12 servings 1x
- Category: Bread
- Method: Baking
- Cuisine: Gluten-Free
Ingredients
- 1.5 cups warm water (370 ml)
- 1 teaspoon sugar (4 grams)
- 1/2 teaspoon active dry yeast (2 grams)
- 3 cups gluten-free flour (420 grams; Caputo recommended)
- 1 teaspoon salt (5 grams)
Instructions
- Activate the Yeast: Combine warm water, sugar, and yeast in a bowl. Let sit for 5 minutes until bubbly.
- Prepare the Dough: In a large bowl, mix gluten-free flour and salt. Gradually add the yeast mixture while stirring until thick and sticky.
- Let It Rise: Cover the dough and let it rise in a draft-free area for 5 hours.
- Shape the Dough: Gently shape into an oval ball without kneading.
- Bake: Place dough in a parchment-lined baking dish covered with a lid or foil, and bake in a cold oven at 450°F (232°C) for 40 minutes, then uncover and bake for an additional 30 minutes until golden brown.
- Cool Down: Allow to cool for 5-10 minutes before slicing.
Nutrition
- Serving Size: 1 slice (50g)
- Calories: 150
- Sugar: 0g
- Sodium: 200mg
- Fat: 0g
- Saturated Fat: 0g
- Unsaturated Fat: 0g
- Trans Fat: 0g
- Carbohydrates: 34g
- Fiber: 2g
- Protein: 2g
- Cholesterol: 0mg