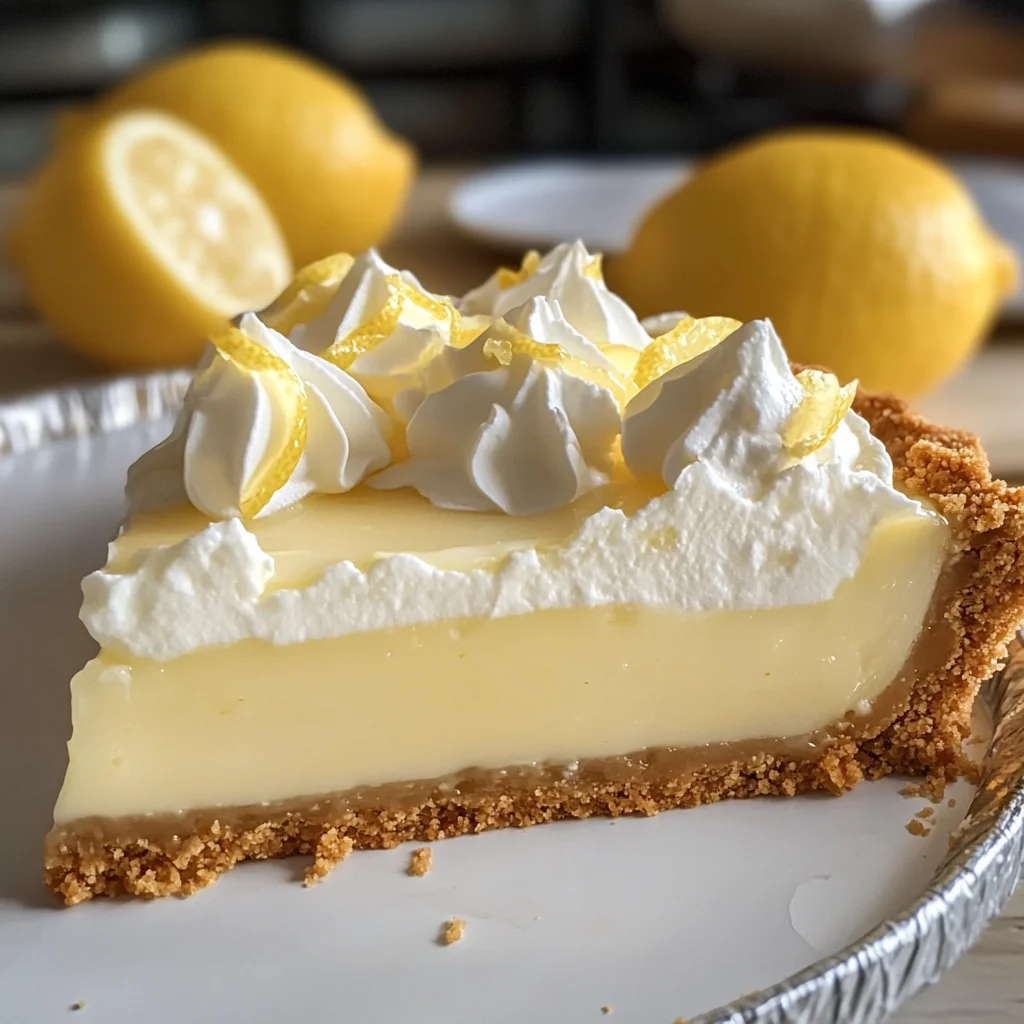
Deliciously Zesty Lemon Icebox Pie Made Easy at Home
This Deliciously Zesty Lemon Icebox Pie Made Easy at Home is the perfect no-bake dessert for any occasion. With its refreshing tang of lemon and creamy texture, this pie is sure to impress your guests during summer gatherings or family get-togethers. It’s not only easy to make but also a delightful treat that brings a burst of flavor to your table.
Why You’ll Love This Recipe
- Easy to Prepare: You can whip this pie up in just 15 minutes, making it an ideal choice for busy days.
- No Baking Required: Perfect for hot summer days when you want a cool dessert without turning on the oven.
- Versatile Dessert: Serve it at parties, barbecues, or as a sweet ending to family dinners.
- Refreshing Flavor: The combination of fresh lemon juice and zest offers a bright and zesty taste that everyone will love.
- Customizable Options: Adjust the lemon zest to suit your taste or experiment with different crust varieties.
Tools and Preparation
To create your Deliciously Zesty Lemon Icebox Pie Made Easy at Home, you’ll need a few essential tools. These will help streamline the process and ensure great results.
Essential Tools and Equipment
- Mixing bowl
- Electric mixer or whisk
- Measuring cups
- Spatula
- Pie dish
Importance of Each Tool
- Mixing bowl: A sturdy mixing bowl provides ample space for combining ingredients without spills.
- Electric mixer or whisk: An electric mixer makes whipping cream cheese smooth and effortless, while a whisk can work in a pinch.
- Measuring cups: Accurate measurements are key to achieving the perfect balance of flavors in your pie.
- Spatula: A spatula ensures that you can fold ingredients gently without losing airiness.

Ingredients
This Lemon Icebox Pie is a no-bake dessert that’s a refreshing treat for summer gatherings.
For the Filling
- 8 oz Cream Cheese (softened)
- 14 oz Condensed Milk
- 1/2 cup Fresh Lemon Juice (fresh is best)
- 1 tbsp Lemon Zest (adjust for desired intensity)
For the Crust
- 1 pcs Grachicken chicken ham Cracker Crust (store-bought or homemade)
- 1/4 cup Butter (unsalted)
How to Make Deliciously Zesty Lemon Icebox Pie Made Easy at Home
Step 1: Prepare the Crust
- If using a homemade cracker crust, crush your crackers and mix them with melted butter until combined.
- Press the mixture into the bottom of your pie dish evenly.
- Set aside while you prepare the filling.
Step 2: Make the Filling
- In a mixing bowl, combine the softened cream cheese and condensed milk. Blend until smooth using an electric mixer or whisk.
- Gradually add in the fresh lemon juice and lemon zest. Mix until fully incorporated.
- Taste the filling and adjust lemon zest if needed for extra zing.
Step 3: Assemble the Pie
- Pour the lemon filling into your prepared crust, spreading it evenly with a spatula.
- Cover with plastic wrap and refrigerate for at least 8 hours, preferably overnight for best results.
Step 4: Serve and Enjoy
- Once set, slice into wedges and serve chilled.
- Garnish with additional lemon zest or whipped cream if desired.
This Deliciously Zesty Lemon Icebox Pie Made Easy at Home is sure to become a favorite in your dessert repertoire!
How to Serve Deliciously Zesty Lemon Icebox Pie Made Easy at Home
Served chilled, this Lemon Icebox Pie is perfect for hot summer days. Its refreshing taste pairs well with various toppings and accompaniments that enhance its zesty flavor.
Toppings
- Whipped Cream: A dollop of freshly whipped cream adds a light and airy texture to each slice.
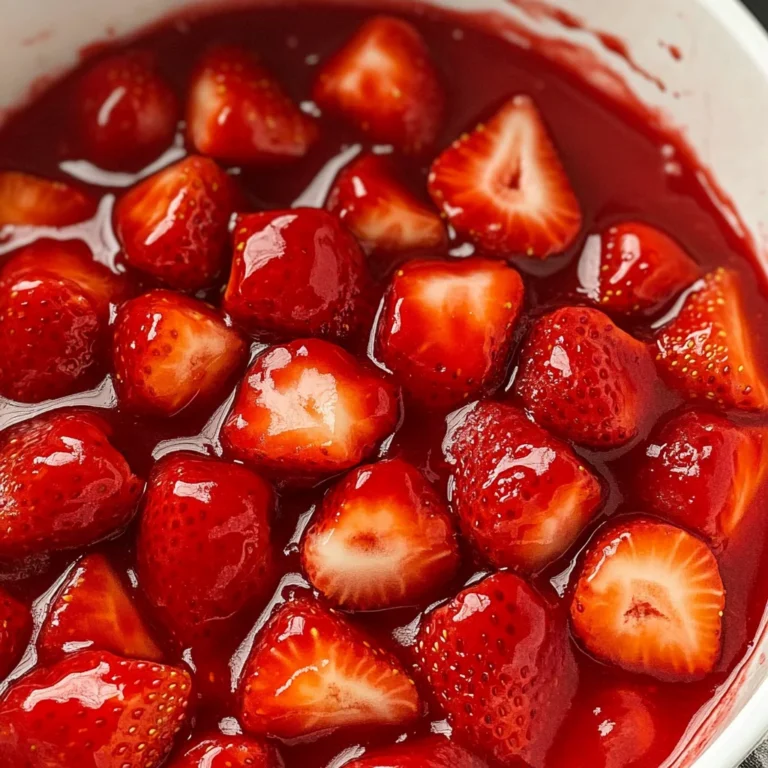
- Fresh Berries: Strawberries, blueberries, or raspberries provide a burst of color and extra sweetness.
- Mint Leaves: A sprig of fresh mint makes for a beautiful garnish and adds a hint of freshness.
Accompaniments
- Iced Tea: A glass of sweetened iced tea complements the tartness of the pie perfectly.
- Coffee: The rich flavor of coffee contrasts nicely with the zesty lemon filling.
- Fruit Salad: A colorful fruit salad can provide a healthy balance to the sweetness of the pie.
How to Perfect Deliciously Zesty Lemon Icebox Pie Made Easy at Home
Achieving the best results with your Lemon Icebox Pie is simple when you follow these tips. They will help you create a creamy texture and vibrant flavor.
- Use Fresh Ingredients: Fresh lemon juice and zest elevate the taste significantly compared to bottled options.
- Chill Thoroughly: Let the pie chill for at least 8 hours or overnight for the best texture.
- Adjust Sweetness: Taste your filling before pouring it into the crust; add more condensed milk or lemon juice as desired.
- Mix Well: Ensure all ingredients are well combined for a smooth filling—this prevents lumps in your pie.
Best Side Dishes for Deliciously Zesty Lemon Icebox Pie Made Easy at Home
To complement your Lemon Icebox Pie, consider serving it alongside some delightful side dishes. Here are some excellent options that enhance this dessert experience.
- Crispy Salad: A light salad with greens and citrus dressing refreshes the palate.
- Grilled Vegetables: Smoky grilled veggies add depth to your meal, balancing out the sweetness of the pie.
- Coleslaw: A tangy coleslaw offers crunch and contrast against the creamy pie.
- Roasted Potatoes: Herb-roasted potatoes make a hearty side that pairs well with any summer meal.
- Garlic Breadsticks: Chewy, warm breadsticks provide a satisfying bite alongside dessert.
- Vegetable Platter: Raw veggies with hummus dip offer a healthy crunch option before dessert.
Common Mistakes to Avoid
Making Deliciously Zesty Lemon Icebox Pie Made Easy at Home is a delightful experience, but there are some common pitfalls to watch out for.
- Using bottled lemon juice: Fresh lemon juice provides the best flavor. Always opt for fresh lemons to enhance your pie’s taste.
- Skipping the zest: The zest adds an extra layer of lemon flavor. Don’t skip it; adjust the amount based on your preference.
- Not chilling long enough: This pie needs adequate time to set. Aim for at least 8 hours in the refrigerator for the perfect texture.
- Overmixing the filling: Be gentle when mixing the cream cheese and condensed milk. Overmixing can result in a runny filling rather than a smooth one.
- Choosing the wrong crust: Make sure to use a sturdy cracker crust. A flimsy crust may not hold up well under the creamy filling.
Storage & Reheating Instructions
Refrigerator Storage
- Store your pie covered in the refrigerator.
- It will keep well for up to 3 days.
Freezing Deliciously Zesty Lemon Icebox Pie Made Easy at Home
- If you want to freeze, wrap it tightly in plastic wrap and aluminum foil.
- It can be stored for up to 2 months in the freezer.
Reheating Deliciously Zesty Lemon Icebox Pie Made Easy at Home
- Oven: This pie is best served cold; avoid reheating in the oven to maintain texture.
- Microwave: If you prefer it slightly softened, microwave it on low power for a few seconds.
- Stovetop: Not recommended, as this dessert should be enjoyed chilled.
Frequently Asked Questions
Here are some common questions about this recipe that will help you prepare your Deliciously Zesty Lemon Icebox Pie Made Easy at Home perfectly.
Can I use other citrus fruits?
Yes, you can substitute lemon with lime or orange juice for a twist on flavor.
How do I make my crust from scratch?
You can crush graham crackers or digestive biscuits and mix them with melted butter. Press into a pan and refrigerate until firm.
What can I add for extra flavor?
Consider adding fresh berries or merengue as toppings to enhance both flavor and presentation.
How long does this pie need to chill?
For best results, let it chill for at least 8 hours before serving. This allows it to set properly.
Final Thoughts
This Deliciously Zesty Lemon Icebox Pie Made Easy at Home is not only refreshing but also versatile. You can customize it with different citrus flavors or toppings like whipped cream or fresh fruit. It’s an ideal dessert for summer gatherings, bringing brightness to any occasion. Give it a try and impress your guests with this delightful treat!
Deliciously Zesty Lemon Icebox Pie Made Easy at Home

Indulge in the refreshing delight of our Deliciously Zesty Lemon Icebox Pie Made Easy at Home. This no-bake dessert combines the bright tang of fresh lemons with a luscious creamy filling, all nestled in a buttery cracker crust. Perfect for summer gatherings or family get-togethers, this pie is not only quick to prepare but also versatile. You can customize it with your favorite toppings, making it an ideal sweet ending to any meal. Impress your guests with this delightful treat that’s both easy and absolutely delicious!
- Prep Time: 15 minutes
- Cook Time: 0 minutes
- Total Time: 15 minutes
- Yield: Serves 8 slices 1x
- Category: Dessert
- Method: No-Bake
- Cuisine: American
Ingredients
- 8 oz Cream Cheese (softened)
- 14 oz Condensed Milk
- 1/2 cup Fresh Lemon Juice (fresh is best)
- 1 tbsp Lemon Zest (adjust for desired intensity)
- 1 pcs Cracker Crust (store-bought or homemade)
- 1/4 cup Unsalted Butter
Instructions
- Prepare the crust by mixing crushed crackers with melted butter and pressing into a pie dish.
- In a bowl, blend softened cream cheese and condensed milk until smooth. Gradually add fresh lemon juice and zest; mix well.
- Pour the filling into the prepared crust, smoothing out evenly.
- Cover with plastic wrap and refrigerate for at least 8 hours or overnight until set.
- Serve chilled, garnished with whipped cream or fresh berries as desired.
Nutrition
- Serving Size: 1 slice (105g)
- Calories: 300
- Sugar: 30g
- Sodium: 210mg
- Fat: 18g
- Saturated Fat: 10g
- Unsaturated Fat: 7g
- Trans Fat: 0g
- Carbohydrates: 32g
- Fiber: 0g
- Protein: 4g
- Cholesterol: 45mg