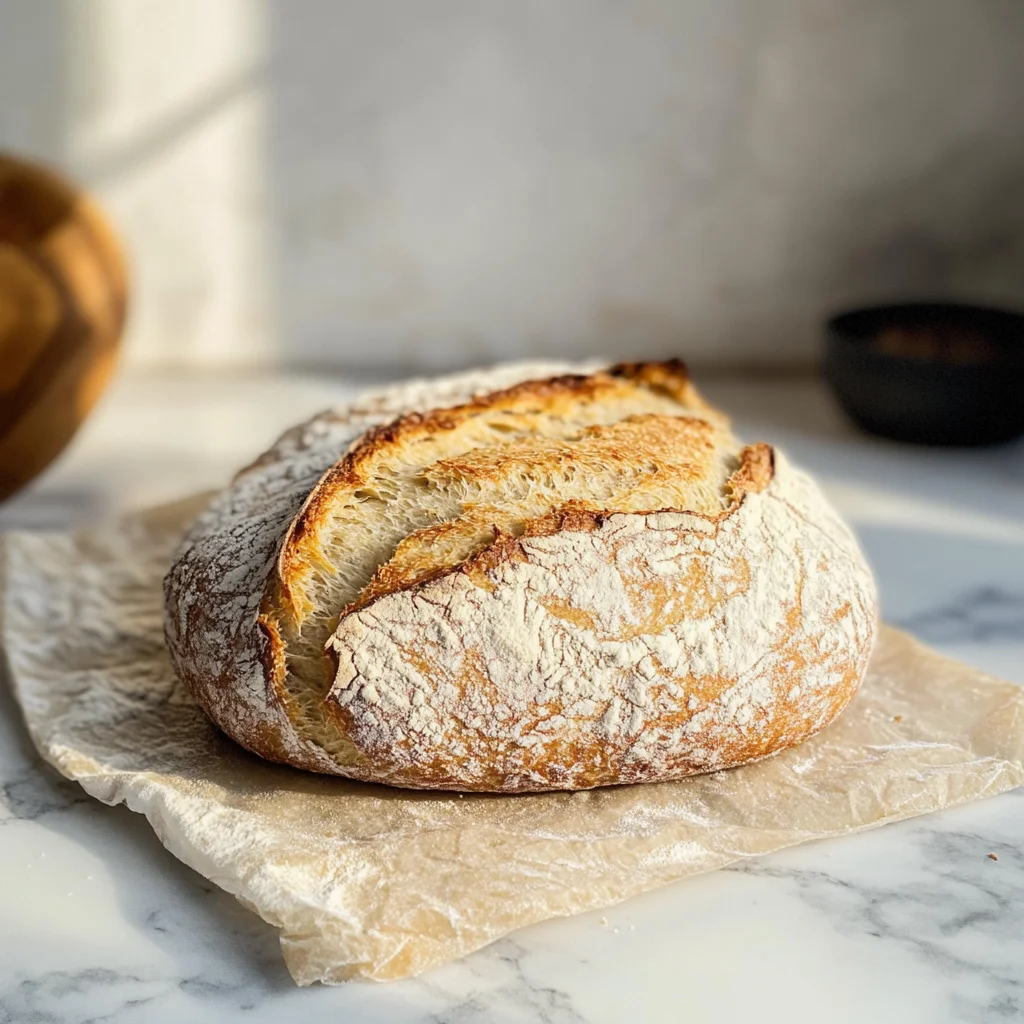
No-Knead Gluten-Free Bread
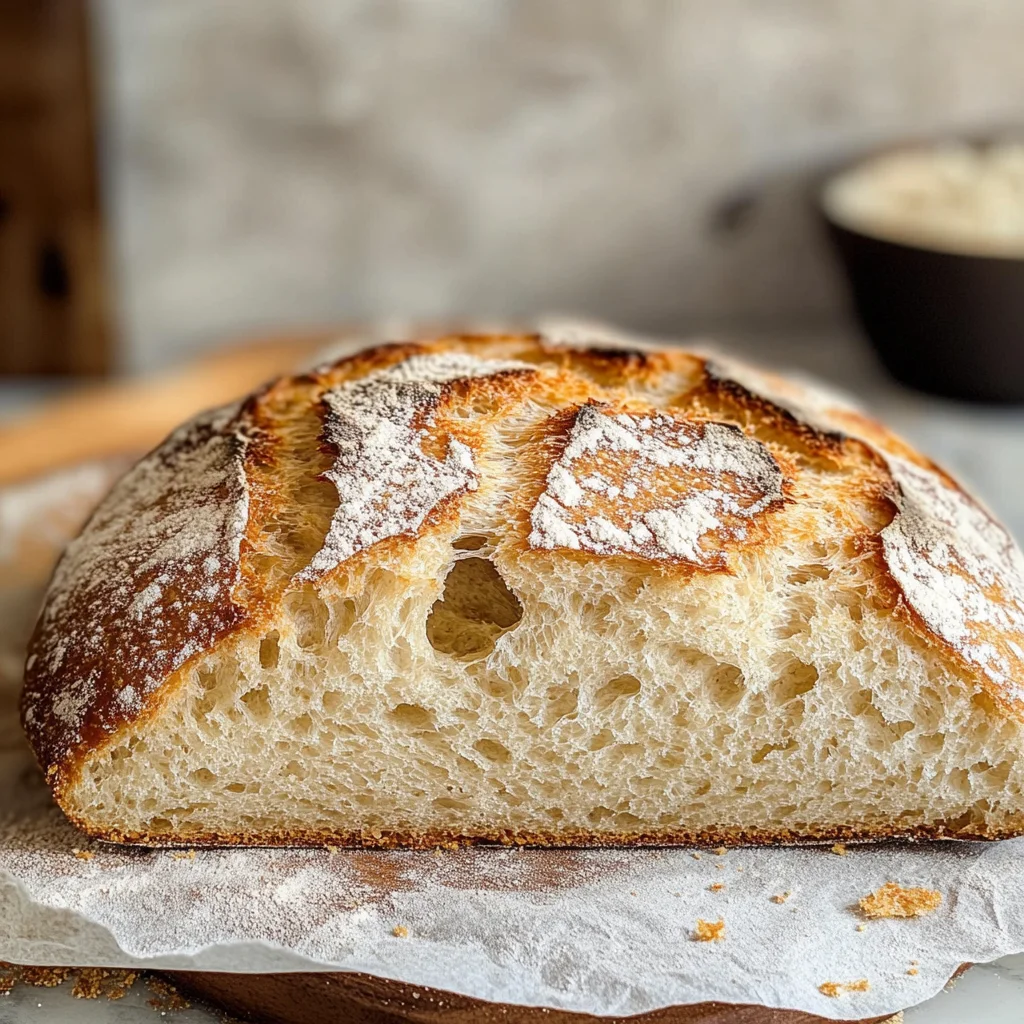
If you’re looking for a simple yet delicious way to enjoy bread without gluten, my No-Knead Gluten-Free Bread is just the ticket. With its fluffy interior and crispy crust, this recipe delivers on taste and texture, making it perfect for any occasion. Whether you need a side for dinner or a base for sandwiches, this bread is sure to please everyone at the table—even those who don’t follow a gluten-free diet.
Why You’ll Love This Recipe
- Easy to Make: This no-knead method requires minimal effort, allowing you to enjoy homemade bread without the fuss.
- Delicious Texture: The fluffy inside paired with a crispy crust offers a satisfying bite that rivals traditional bread.
- Versatile Uses: Perfect for sandwiches, toast, or simply enjoying with your favorite spreads.
- Long Shelf Life: Unlike some gluten-free breads, this one stays fresh longer, so you can savor it throughout the week.
- Customizable: Feel free to add herbs or spices to create your own unique flavor profile.
Tools and Preparation
To make your No-Knead Gluten-Free Bread, gather the necessary tools and prepare your kitchen. Having everything ready will streamline the process and make baking more enjoyable.
Essential Tools and Equipment
- Mixing bowls
- Measuring cups and spoons
- Baking dish (with or without lid)
- Parchment paper
- Whisk or spoon
Importance of Each Tool
- Mixing bowls: Essential for combining ingredients evenly without mess.
- Baking dish: A versatile tool that helps in achieving an even bake. Choose one that fits your oven well.
- Parchment paper: Prevents sticking and makes cleanup a breeze. It also promotes even cooking.
Ingredients
Here’s what you’ll need to create this delightful No-Knead Gluten-Free Bread:
- 1.5 cups warm water (370 ml)
- 1 teaspoon sugar (4 grams)
- 1/2 teaspoon active dry yeast (2 grams)
- 3 cups gluten-free flour (420 grams) I used Caputo
- 1 teaspoon salt (5 grams)
How to Make No-Knead Gluten-Free Bread
Step 1: Activate the Yeast
- Begin by combining the warm water, sugar, and yeast in a mixing bowl.
- Stir gently and let it sit for about five minutes until bubbly. If no bubbles form, repeat this step with fresh ingredients.
Step 2: Prepare the Dough
- In another large bowl, mix the gluten-free flour and salt together.
- Gradually add the activated yeast mixture into the flour while stirring until you reach a thick sticky dough consistency. It should neither be too wet nor too dry.
Step 3: Let It Rise
- Cover the bowl with plastic wrap or a damp cloth and let it rest at room temperature for about 5 hours away from drafts.
- Once risen, lightly flour your work surface and pour out the dough onto it.
Step 4: Shape the Dough
- Sprinkle some flour on top of the dough.
- Gently shape it into an oval ball without kneading—just form it into shape.
Step 5: Prepare for Baking
- Transfer your shaped dough into any baking dish lined with parchment paper.
- Cover it with a lid or double foil if you don’t have a lid.
Step 6: Bake It!
- Place the baking dish in a cold oven and set the temperature to 450°F (232°C).
- Bake for 40 minutes without preheating; then check if it’s golden all over.
Step 7: Cool Down
- Once baked, remove from the oven and let cool for about 5 to 10 minutes before slicing into it.
- Enjoy fresh slices of your delightful No-Knead Gluten-Free Bread!
This easy recipe is sure to become a staple in your kitchen!
How to Serve No-Knead Gluten-Free Bread
No-Knead Gluten-Free Bread is incredibly versatile and can be enjoyed in various ways. Whether you’re serving it as an appetizer or a side dish, there’s no wrong way to enjoy this delicious bread.
As a Toasted Slice
- Toast the bread for a crispy texture. Top with avocado, tomato, or your favorite spread for a delightful snack.
With Dips
- Serve warm slices with hummus, olive tapenade, or tzatziki for a tasty appetizer that pairs perfectly with the bread’s fluffy texture.
Sandwiches
- Use the bread to create hearty sandwiches. Fill them with turkey, chicken, or fresh vegetables for a satisfying meal.
With Soups
- Enjoy crusty slices alongside your favorite soups or stews. The bread is perfect for dipping and soaking up flavors.
Breakfast Option
- Slice and serve as part of a breakfast platter. Pair it with fruit preserves or nut butter for a sweet morning treat.
Cheese Board Addition
- Incorporate the bread into your cheese board. Its unique texture complements cheeses beautifully and adds variety to your spread.
How to Perfect No-Knead Gluten-Free Bread
To achieve the perfect No-Knead Gluten-Free Bread, consider these helpful tips that will enhance your baking experience and results.
- Use warm water: Ensure the water is lukewarm (not hot) when activating yeast. This helps in proper rising.
- Measure accurately: Use kitchen scales for precision in measuring flour and other ingredients to maintain consistency.
- Let it rise properly: Allow the dough to rest for at least 5 hours at room temperature. This step is crucial for fluffy texture.
- Don’t rush baking: Place the bread in a cold oven; this creates steam during baking and results in a crustier exterior.
- Experiment with flours: If using different gluten-free flours, adjust based on moisture absorption rates; some may require more water.
- Store properly: Keep leftover bread wrapped in parchment paper to maintain its freshness without getting soggy.
Best Side Dishes for No-Knead Gluten-Free Bread
Pairing No-Knead Gluten-Free Bread with delicious side dishes can elevate any meal. Here are some fantastic options to consider:
- Roasted Vegetables: A mix of seasonal vegetables roasted until caramelized provides a great contrast to the bread’s texture.
- Fresh Salad: A crisp green salad with vinaigrette complements the fluffy bread wonderfully while adding freshness.
- Garlic Mashed Potatoes: Creamy mashed potatoes infused with garlic make for a comforting pairing that everyone loves.
- Grilled Chicken Skewers: Juicy chicken skewers seasoned well can turn your meal into something special when served alongside this bread.
- Vegetable Stir-Fry: A colorful vegetable stir-fry brings flavor and nutrition that balances out the meal nicely.
- Chickpea Salad: A protein-packed chickpea salad tossed with herbs adds a refreshing element alongside warm slices of bread.
- Stuffed Peppers: Colorful peppers filled with grains and veggies offer an exciting presentation and taste when served together.
- Quinoa Pilaf: Lightly seasoned quinoa pilaf makes for a healthy side that pairs well with the savory notes of the bread.
Common Mistakes to Avoid
When making No-Knead Gluten-Free Bread, it’s easy to encounter some common pitfalls. Here are a few mistakes to watch out for:
- Ignoring yeast activation: Always ensure that your yeast is activated before mixing it with the flour. If it doesn’t bubble after five minutes, start again with fresh ingredients.
- Using cold water: Make sure your water is lukewarm. Water that is too hot or cold can hinder the yeast’s ability to activate, affecting the rise of your dough.
- Not measuring flour accurately: Too much or too little flour can lead to a poor dough consistency. Use a kitchen scale for precise measurements.
- Skipping resting time: Allowing the dough to rest for five hours is crucial for achieving that perfect rise and texture. Don’t rush this step!
- Overbaking or underbaking: Keep an eye on your bread in the oven. Every oven differs; check for a golden crust and a hollow sound when tapped on the bottom.
Storage & Reheating Instructions
Refrigerator Storage
- Store your No-Knead Gluten-Free Bread in an airtight container.
- It will stay fresh in the refrigerator for about 3-5 days.
Freezing No-Knead Gluten-Free Bread
- Wrap slices tightly in plastic wrap or aluminum foil.
- Freeze for up to 3 months for optimal freshness.
Reheating No-Knead Gluten-Free Bread
- Oven: Preheat to 350°F (175°C). Place bread directly on the rack for about 10 minutes until warmed through.
- Microwave: Wrap in a damp paper towel and heat for about 15-20 seconds per slice until warm.
- Stovetop: Heat in a skillet over medium-low heat, flipping occasionally until warmed through.
Frequently Asked Questions
Here are some common questions about making No-Knead Gluten-Free Bread:
How do I know if my yeast is active?
Check if it bubbles within five minutes of adding sugar and warm water. If not, try again with fresh yeast.
Can I use different gluten-free flours?
Yes, you can experiment with other gluten-free flours, but results may vary. Caputo’s is recommended for best results.
How long should I let the dough rest?
Let the dough rest covered at room temperature for five hours. This is essential for achieving a good rise.
What can I add for flavor?
Consider adding herbs, seeds, or spices into the dough before baking for added flavor and texture.
Can I make this recipe dairy-free?
Absolutely! This recipe is naturally dairy-free as it doesn’t call for any dairy ingredients.
Final Thoughts
This No-Knead Gluten-Free Bread recipe offers a delightful combination of fluffiness and crispiness, making it perfect for any meal. Feel free to customize it by adding your favorite herbs or seeds, turning it into a unique creation every time you bake. Give it a try!
No-Knead Gluten-Free Bread

Experience the joy of baking with this No-Knead Gluten-Free Bread recipe, where simplicity meets deliciousness. Perfectly fluffy on the inside and wonderfully crispy on the outside, this bread is your go-to option whether you’re making sandwiches, enjoying it with soups, or simply toasting it for breakfast. The no-knead method allows you to create a rustic loaf with minimal effort, making it suitable for both novice home bakers and seasoned chefs alike. Customize it with your favorite herbs or spices to elevate its flavor profile. With a long shelf life, this bread will be a delightful addition to your meals throughout the week.
- Prep Time: 15 minutes
- Cook Time: 40 minutes
- Total Time: 55 minutes
- Yield: Approximately 12 servings 1x
- Category: Bread
- Method: Baking
- Cuisine: Gluten-Free
Ingredients
- 1.5 cups warm water
- 1 teaspoon sugar
- 1/2 teaspoon active dry yeast
- 3 cups gluten-free flour
- 1 teaspoon salt
Instructions
- In a mixing bowl, combine warm water, sugar, and yeast. Stir gently and let sit for about five minutes until bubbly.
- In a large bowl, mix gluten-free flour and salt. Gradually add the activated yeast mixture while stirring until you achieve a thick sticky dough.
- Cover the bowl with plastic wrap or a damp cloth and let it rise at room temperature for about 5 hours.
- On a floured surface, shape the dough into an oval ball without kneading.
- Transfer to a baking dish lined with parchment paper and cover.
- Place in a cold oven set to 450°F (232°C) and bake for 40 minutes until golden brown.
- Allow cooling for 5 to 10 minutes before slicing.
Nutrition
- Serving Size: 1 slice (50g)
- Calories: 140
- Sugar: 0g
- Sodium: 150mg
- Fat: 1g
- Saturated Fat: 0g
- Unsaturated Fat: 0g
- Trans Fat: 0g
- Carbohydrates: 30g
- Fiber: 2g
- Protein: 3g
- Cholesterol: 0mg